
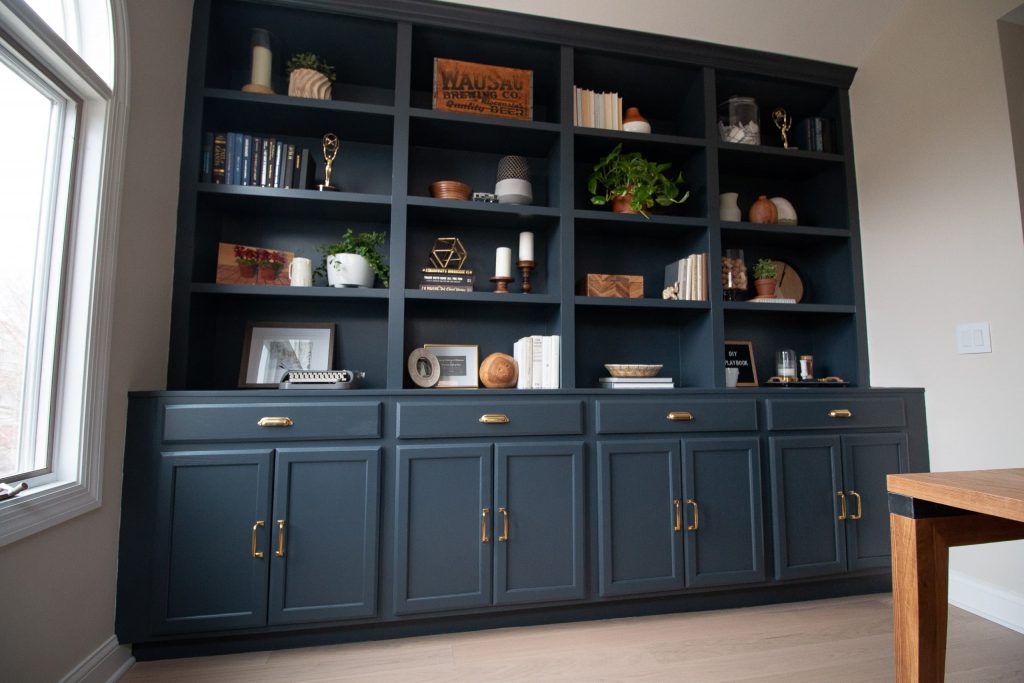
Building a built-in shelf for an office is a great way to add extra storage and organization to your space. This project is relatively easy to do and can be completed in a weekend. The first step is to measure the area where you want the shelves to go.
Then, cut the shelving material to size and attach it to the wall using brackets or screws. Next, add any trim or molding you desire to give the shelves a finished look. Finally, paint or stain the shelves and fill them with books, office supplies, or whatever else you need to store.
- Decide on the dimensions of your built-in shelf
- Cut out plywood panels to those dimensions
- Attach the plywood panels to studs in the wall using screws and construction adhesive
- Cover the edges of the plywood with trim pieces
- Paint or finish the shelf as desired
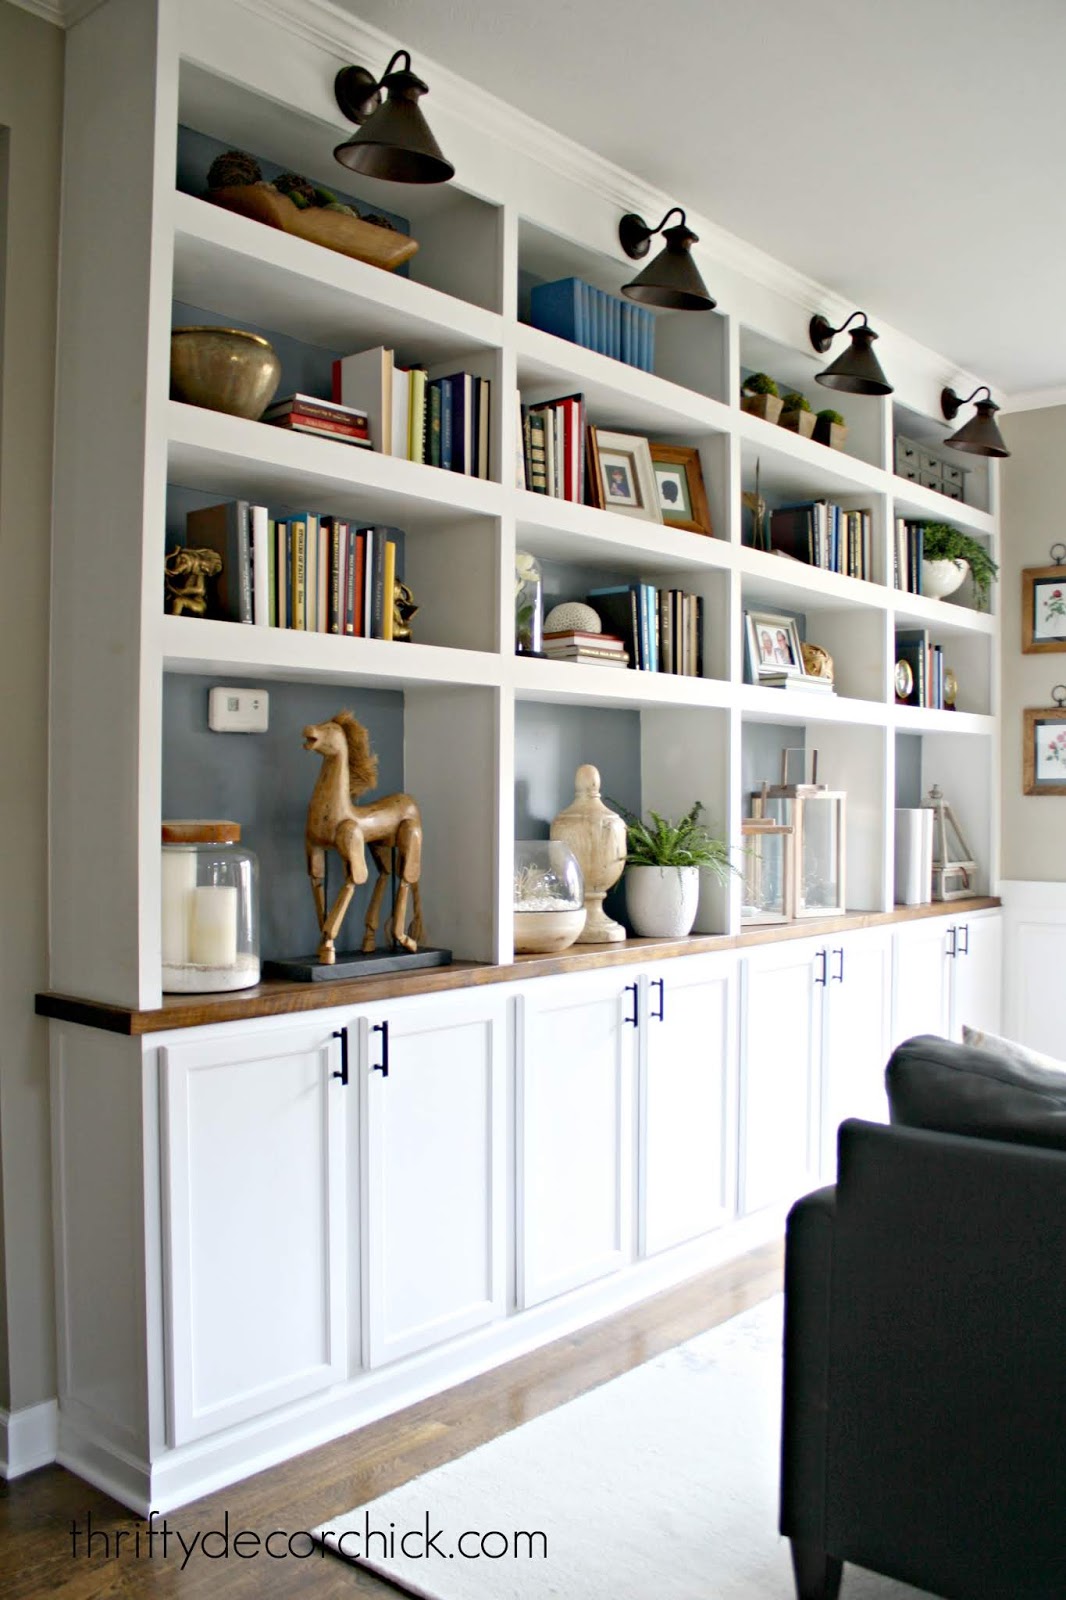
Credit: www.thriftydecorchick.com
How Do I Build My Own Built in Shelves?
When it comes to adding storage space to your home, built-in shelves are a great option. Not only do they provide a place to store your belongings, but they can also be used as a decorative element in your home. If you’re looking to add built-in shelves to your home, here’s what you need to know.
First, decide where you want the shelves to go. Built-in shelves can be added to just about any room in your home, so take some time to think about which area would benefit from the extra storage space. Once you have a location in mind, measure the space and determine how many shelves you’ll need and how deep they should be.
Next, it’s time to start shopping for the materials you’ll need. If you’re handy with tools, you can probably build the shelves yourself using lumber and other supplies from your local hardware store. However, if you prefer not to get too involved in the construction process, there are plenty of pre-made shelving units available that can be easily installed.
Just make sure to choose one that matches the style of your home and fits within your budget.
Once you have all of your materials ready, it’s time to start building (or installing) your new built-in shelves! Follow the instructions that came with your shelving unit or consult with a professional if needed – once everything is in place, enjoy having some new extra storage space in your home!
Is It Cheaper to Buy Shelves Or Build Them?
When it comes to storage solutions in the home, shelves are a popular option. But is it cheaper to buy shelves or build them? The answer may surprise you.
In general, buying shelves is going to be the cheaper option. This is because when you buy shelves, you are getting a product that has already been manufactured and does not require any additional work on your part. Building shelves, on the other hand, will require some materials and tools as well as time and effort on your part.
If you do decide to build your own shelves, there are ways to save money. For example, using recycled wood or salvaged lumber can help reduce the cost of materials. And if you have some basic carpentry skills, building simple shelving units yourself can be a relatively easy and affordable project.
Ultimately, the decision of whether to buy or build shelves comes down to personal preference and budget. If you have the time and resources available to build your own shelves, then go for it! But if you’re looking for an inexpensive storage solution that requires minimal effort, buying ready-made shelving units is probably your best bet.
How Do I Build a Custom Built in Bookshelf?
Building a custom built-in bookshelf may seem like a daunting task, but with careful planning and execution it can be a relatively easy and rewarding project. Here are some tips to help you get started:
1. Decide on the overall size and shape of your bookshelf. This will determine how much lumber you’ll need to purchase and how much work will be involved.
2. Choose the location for your bookshelf carefully. It’s important to take into account things like sunlight exposure and foot traffic when deciding where to put your new piece of furniture.
3. Cut all of your lumber to size according to your plans. If you’re not comfortable doing this yourself, there are plenty of hardware stores or home improvement centers that will do it for you. Just be sure to have them make the cuts exactly as you need them.
4. Assemble your bookshelf using screws, nails, or brackets – whatever is necessary to keep everything sturdy and in place. Again, if you’re not comfortable doing this yourself, there are plenty of professionals who can help out (and it’s usually worth paying for their services if this is your first time tackling such a project).
5. Finish off your bookshelf by adding trim around the edges and painting or staining it to match the rest of your décor. Custom built-ins are a great way to add both function and beauty to any room in your home!
How Do You Make Fake Built in Bookshelves?
If you want to create the illusion of built-in bookshelves without actually having them built into your home, there are a few things you can do. First, consider painting the back wall of your shelving unit the same color as the walls in your room. This will help make the shelves appear as if they are flush against the wall and creates a continuous look.
You can also add molding around the top and bottom of the shelves to give them more of a built-in appearance. Finally, consider adding wallpaper to the back of the shelves. This will give them an added depth and make them look even more like they are part of the architecture of your home.
How to Build Custom Bookcases with Built-In Desk
How to Build Built in Shelves
If you’re looking for a way to add some extra storage space to your home, built-in shelves are a great option. They can be added to just about any room and are perfect for storing everything from books to dishes. Building your own built-in shelves is a relatively easy project that anyone with basic carpentry skills can handle.
Here’s how to do it:
1. Choose the location for your shelves. This will likely be dictated by the space you have available, but keep in mind that built-in shelves should be placed against a wall for support.
2. Decide on the dimensions of your shelves. Again, this will be determined by the space you have available and what you plan on using the shelves for.
3. Cut the lumber for your shelving unit using a saw ( Circular , Table , Miter ). You’ll need enough boards to create both sides of the shelving unit plus additional supports in between if necessary. The number of boards you’ll need will depend on the dimensions of your unit and how many shelves you want.
4. Assemble the shelving unit by nailing or screwing the boards together ( predrill holes first to avoid splitting the wood). If using screws, make sure they’re long enough to go through all layers of wood and into studs behind the drywall for added support. Add any additional supports (such as crosspieces) as needed so that your shelving unit is sturdy.
5. Attach your shelving unit to the wall by screwing it into studs . Again, predrill holes first so that you don’t split any wood . Be sure that your screws are long enough to go through all layers of wood and into at least two studs for added stability .
Conclusion
If you’re looking to add some extra storage space to your office, a built-in shelf is a great option. With just a few supplies and some basic carpentry skills, you can easily build a sturdy shelf that will fit right into your space. Start by measuring the area where you want the shelf to go.
Then, cut two pieces of lumber to size and attach them with screws or nails. Next, use more screws or nails to attach the assembled frame to the wall. Finally, add some finishing touches like trim molding, or paint, and voila!
You’ve got yourself a custom built-in shelf that’s perfect for storing books, files, or any other office supplies.